How to Clean Refrigerator Condenser Coils (And Why It Matters)
Knowing how to clean refrigerator condenser coils is one of the most effective — and most overlooked — maintenance tasks a homeowner can do. The condenser coils are responsible for releasing the heat that the refrigerator removes from its interior. When they’re coated in dust, pet hair, and debris, they can’t release heat efficiently, which […]
Knowing how to clean refrigerator condenser coils is one of the most effective — and most overlooked — maintenance tasks a homeowner can do. The condenser coils are responsible for releasing the heat that the refrigerator removes from its interior. When they’re coated in dust, pet hair, and debris, they can’t release heat efficiently, which forces the compressor to work harder and longer to maintain temperature. The result: higher energy bills, a refrigerator that runs constantly, and a significantly shorter appliance lifespan.
The good news is that cleaning condenser coils takes about 15 minutes and requires no special tools. This guide shows you exactly how to do it, how often to do it, and how to tell if dirty coils are already causing problems.
What Are Condenser Coils and What Do They Do?
Your refrigerator works by cycling refrigerant through two sets of coils: the evaporator coils inside the fridge (which absorb heat) and the condenser coils outside (which release that heat into the room). The condenser coils are typically located either underneath the refrigerator (accessed through the front grille) or at the back.
For heat to transfer from the coils into the air efficiently, air needs to flow freely around the coil surfaces. When those surfaces are coated in a layer of dust and debris, the heat can’t escape — the refrigerant stays warm, the compressor has to run longer to compensate, and the whole system operates under unnecessary stress.
Signs That Your Condenser Coils Need Cleaning
- The compressor runs almost constantly and the fridge never seems to fully shut off
- The refrigerator feels warm to the touch on the sides or back
- The fresh food compartment isn’t as cold as it should be despite the compressor running
- Your electricity bill has increased without explanation
- You haven’t cleaned the coils in over a year — or ever
Dirty condenser coils are one of the leading causes of refrigerators that run but don’t cool properly. If you’re seeing temperature issues, check the coils before assuming a more serious mechanical fault. Our article on why your refrigerator runs but doesn’t cool covers the full diagnostic process including coils.
How Often to Clean Condenser Coils
- Every 6–12 months for most households
- Every 3–6 months if you have pets that shed heavily, or if the fridge is in a dusty environment (garage, workshop)
- Every 3 months if the fridge is in a space with poor ventilation
What You’ll Need
- A vacuum cleaner with a brush attachment or crevice tool
- A condenser coil cleaning brush (long, flexible — available at hardware stores for a few dollars) — optional but very helpful
- A flashlight
- A screwdriver (to remove the front grille if needed)
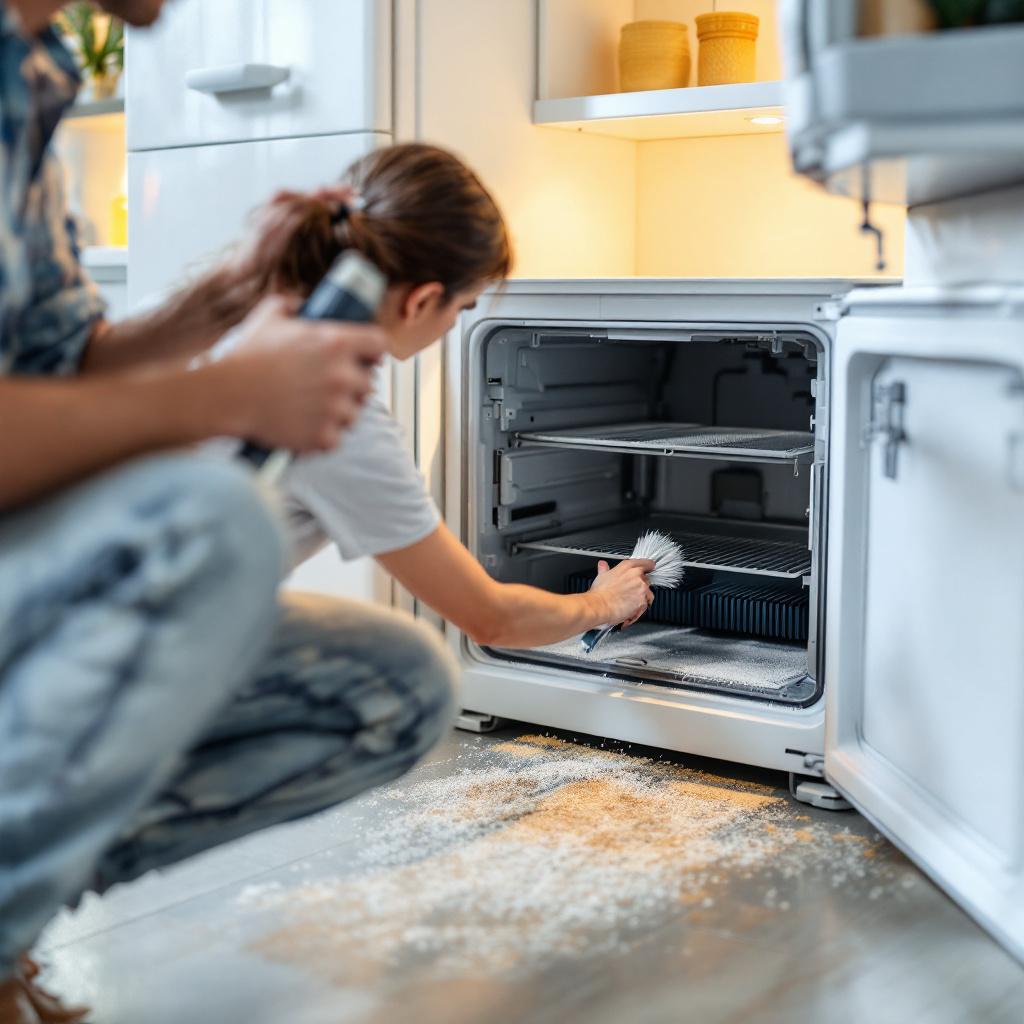
Step-by-Step: How to Clean the Coils
Step 1: Unplug the refrigerator
Always disconnect power before accessing the condenser coils. Pull the fridge out from the wall slightly to reach the power cord, or switch off its dedicated circuit if it’s built-in.
Step 2: Locate the coils
On most modern refrigerators, the condenser coils are underneath the unit, behind the front kick plate (a snap-off or screw-on grille at floor level). On older or some European-style models, the coils are exposed at the back of the unit.
Step 3: Remove the kick plate
Snap or unscrew the front grille. Set it aside — it will likely need cleaning too.
Step 4: Vacuum the coils
Use your vacuum with the brush attachment to remove as much loose dust and debris as possible. Work methodically across the coil surface. The coil brush can reach between the fins to dislodge compacted dust that the vacuum can’t reach directly.
Step 5: Vacuum the fan
The condenser fan (located near the coils) also collects dust. Clean the fan blades carefully and make sure they spin freely.
Step 6: Clean the floor area and kick plate
Dust falls to the floor during cleaning — vacuum it up before replacing the grille. Wipe the kick plate with a damp cloth.
Step 7: Restore power and check clearance
When you push the fridge back, ensure there’s at least 5cm (2 inches) of clearance at the back and sides for air circulation. Pushing the fridge tight against the wall traps heat and undoes the benefit of cleaning the coils.
After Cleaning: What to Expect
After a thorough coil cleaning on a unit with heavily coated coils, you’ll often notice the compressor cycles off more frequently, the sides of the fridge feel cooler, and the unit runs noticeably quieter. On fridges that have been running warm despite the compressor working constantly, cooling performance typically improves within a few hours.
Coil Cleaning as Part of Broader Appliance Care
Condenser coil cleaning is one of the highest-impact maintenance tasks you can do for a refrigerator, but it fits into a broader pattern of appliance care that extends the working life of every major appliance in your home. The habits that keep a refrigerator running well are the same habits that prevent expensive repairs across all your appliances — our guide to appliance lifespan covers what realistic lifespans look like and what maintenance tasks have the most impact.
If cleaning the coils doesn’t resolve a persistent cooling or running issue, the next step is to evaluate whether repair or replacement makes more sense for your specific appliance age and model. Our repair vs. replace cost guide walks through the decision framework.
When to Call a Professional
Coil cleaning is a DIY-friendly task. However, if you clean the coils and the fridge still runs constantly, doesn’t cool properly, or makes unusual noises, the problem is mechanical rather than maintenance-related. A compressor issue, refrigerant leak, or failing evaporator fan motor requires professional diagnosis.
North Vancouver Appliances is available for refrigerator diagnostics and repairs across the North Shore. Visit our refrigerator repair page to get in touch.