Troubleshoot a Dryer That’s Overheating
Hello, North Vancouver homeowners! We’re the team at North Vancouver Appliance Repair, your local experts in keeping appliances running smoothly across the North Shore. With years of experience fixing everything from fridges to dryers, we’ve seen our fair share of overheating dryers—a common issue that can damage clothes, hike up energy bills, and even pose fire risks. If your dryer feels like a furnace or your laundry comes out scorching, don’t worry. In this comprehensive guide, we’ll walk you through troubleshooting the problem step by step, sharing insights from our daily service calls. We’ll cover why dryers overheat, safety precautions, a detailed diagnostic process, and tips to prevent future issues. And if you need a hand, our certified technicians are just a call away at https://northvancouverappliances.ca. Let’s get your dryer back to normal!
Understanding Why Your Dryer Is Overheating
Dryers generate heat to evaporate moisture from clothes, but when that heat isn’t properly managed, things can go wrong. From our extensive repair work, we’ve identified several common causes of overheating, especially in North Vancouver’s unique coastal climate.
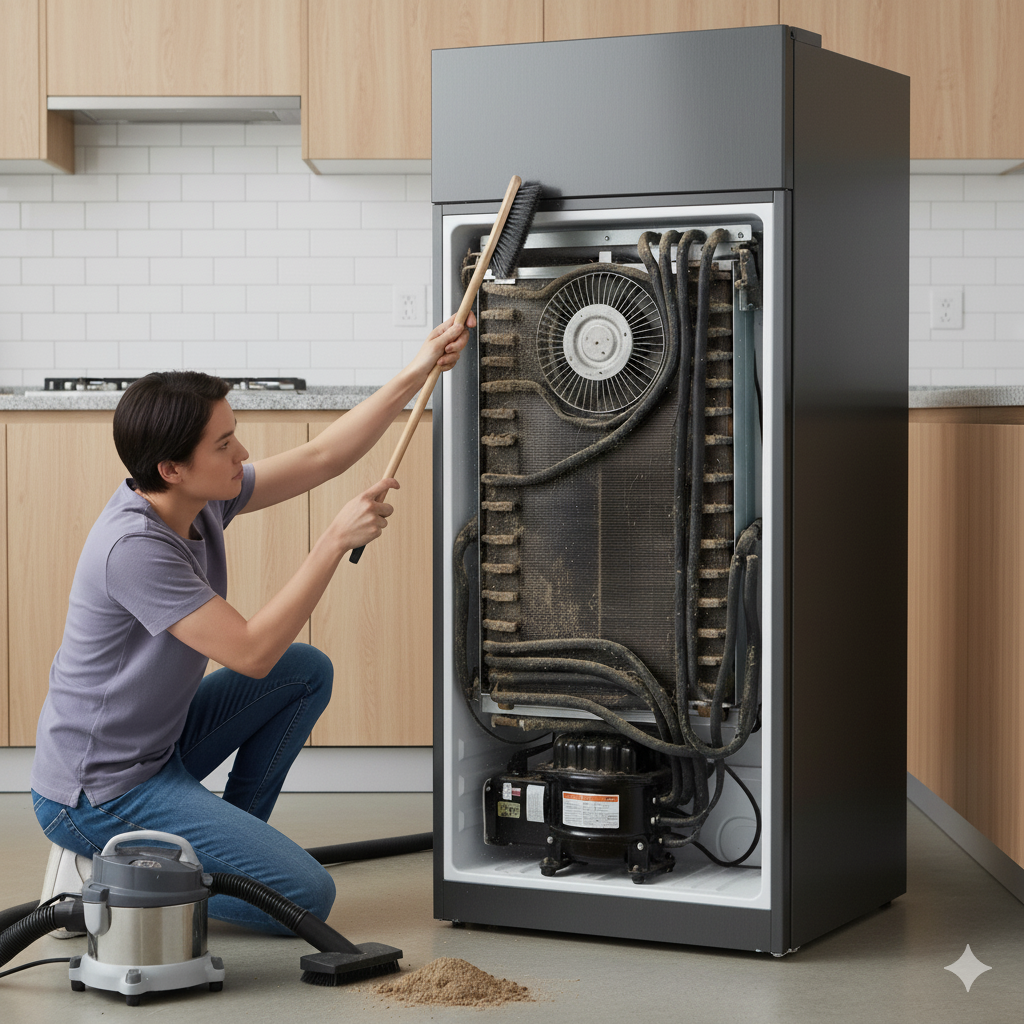
Blocked Ventilation: The leading culprit is poor airflow. Your dryer expels hot, moist air through a vent duct to the outside. Lint, a byproduct of drying, can clog the filter, hose, or duct, trapping heat inside. It’s like running with a clogged nose—everything overheats. The U.S. Fire Administration notes over 2,900 dryer fires annually in North America, many due to lint buildup. In North Vancouver, where humidity encourages faster lint clumping, we’ve cleared ducts packed with years of debris, sometimes even mold.
Faulty Temperature Controls: Thermostats and thermal fuses regulate dryer temperature. The cycling thermostat maintains a safe range (120-160°F), while the high-limit thermostat and thermal fuse act as backups, shutting off the dryer if it gets too hot. These can fail from age, power surges, or overuse, common in busy households. We often replace these in older models like Whirlpool or Kenmore.
Heating Element Issues: In electric dryers, a coiled wire generates heat. If it shorts or breaks, it may produce excessive or uneven heat. Gas dryers rely on an igniter and gas valve coils, which can malfunction similarly. Hard water in areas near the Burrard Inlet can accelerate wear on these parts, something we see regularly.
Mechanical Failures: A damaged blower wheel or struggling motor reduces airflow, causing heat buildup. The blower pushes air through the drum, and the motor drives it. If either is clogged or failing, the dryer overheats. We’ve repaired motors strained by heavy loads, like sports gear from active families.
User Habits and Environment: Overloading the drum restricts airflow, while incorrect settings (e.g., high heat for delicates) can push temperatures too high. Drying items like rubber-backed mats or oily rags is risky—they can melt or ignite. North Vancouver’s damp weather and occasional rodent nests in vents add local challenges.
Ignoring overheating can lead to melted components, ruined clothes, or fires, so let’s address it safely and systematically.
Safety Precautions Before You Start
Safety is non-negotiable. We’ve seen DIY attempts go awry, so follow these precautions to stay safe:
- Disconnect Power: Unplug electric dryers or turn off the circuit breaker. For gas models, shut off the gas valve and unplug the cord to prevent shocks or leaks.
- Work Smart: Choose a well-lit, ventilated area. Wear gloves to avoid sharp edges, safety glasses for debris, and a mask if sensitive to dust. Keep a Class C fire extinguisher nearby for electrical fires.
- Tools Needed: Gather a Phillips and flathead screwdriver, nut driver set, vacuum with crevice tool, flashlight, multimeter (for electrical tests), and a dryer vent cleaning kit. Avoid power tools near wires.
- Know Your Limits: If you smell gas, see smoke, or feel unsure—especially with gas dryers—stop and call professionals. Gas work requires expertise, and our team is fully licensed.
- Check Warranty: Review your dryer’s manual (download it if lost) and warranty status. DIY repairs may void coverage.
If you notice burning smells or suspect serious issues, contact us immediately at North Vancouver Appliance Repair. Your safety is our priority.
Step-by-Step Troubleshooting Guide
Let’s dive into diagnostics, starting with simple fixes and moving to complex checks. This process, honed from countless service calls, takes 1-3 hours depending on your setup. Follow along, and if it gets tricky, we’re here to help.
Step 1: Clean the Lint Filter and Vent Hose
This fixes most overheating issues. Remove the lint screen (typically on top or inside the door) and clear all lint. If it’s coated or greasy, wash with warm soapy water, rinse thoroughly, and dry completely before reinstalling. Run an empty air fluff cycle to check airflow.
Next, unplug the dryer and pull it out (get help—it’s heavy). Disconnect the flexible vent hose from the back and vacuum inside the dryer’s exhaust port and the hose itself. Use a vent brush for stubborn lint. Outside, check the vent hood—ensure the flap moves freely and clear any debris like leaves or snow, common in North Vancouver winters. Reconnect and test with a small load. If it still runs hot, the clog may be deeper.
What if it’s not fixed? The ductwork beyond the hose might be blocked. Move to Step 2.
Step 2: Deep Clean the Vent Duct System
Long or twisty ducts, especially in condos or older homes, can trap lint. Use a vent cleaning kit with flexible rods and brushes (available at hardware stores for $15-25). Feed the brush through from both the dryer and external vent, twisting to dislodge lint, and vacuum as you go. For rigid ducts, remove sections if accessible.
In North Vancouver’s multi-unit buildings, shared or complex ducts may require professional cleaning. If your duct exceeds 25 feet or has multiple bends, it’s less efficient—consider shortening it or adding a booster fan. Test after cleaning. If overheating persists, components are likely the issue.
Still hot? Electrical parts are next.
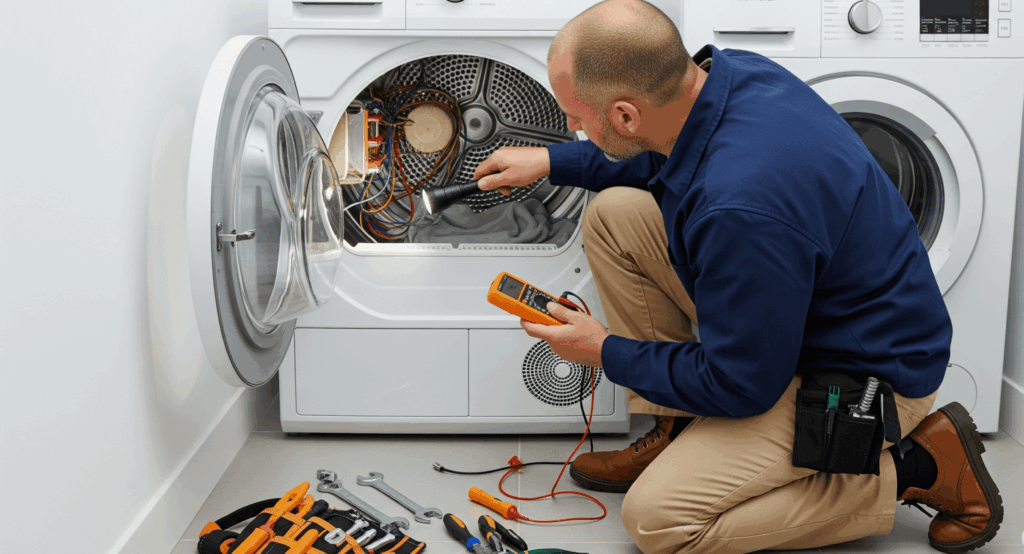
Step 3: Test Thermostats and Thermal Fuse
Now we’re checking temperature controls. Locate the thermostats (often near the blower or heating element—check your manual). Unplug the dryer, label and disconnect wires, and use a multimeter set to continuity. A good thermostat reads 0-50 ohms; infinite means it’s faulty. Replace with an exact match ($10-20 online).
The thermal fuse, typically on the exhaust duct, is a one-time safety device. Test for continuity—if none, it’s blown due to a prior overheat. Replace it ($10-15), but address the root cause (e.g., venting) to avoid repeat failures. Reassemble and test.
No luck? Check the heating system.
Step 4: Inspect the Heating Assembly
For electric dryers, access the heating element by removing the back or front panel (consult manual). Look for breaks, burns, or blisters on the coil. Test resistance with a multimeter (7-30 ohms is normal). If faulty, replace it ($20-50). Discharge any capacitors first to avoid shocks.
For gas dryers, inspect the igniter for cracks—it should glow orange when working. Test gas valve coils for continuity. These parts are delicate, so handle carefully. If you’re not confident, our techs can swap them efficiently.
Still overheating? Look at airflow mechanics.
Step 5: Check the Blower Wheel and Motor
The blower wheel, behind the front panel, pushes air through the drum. Remove it (per manual) and spin by hand—it should turn smoothly. Clean lint off blades or replace if cracked ($20-40). The motor drives the blower and drum; listen for grinding or humming, indicating strain. Testing motor windings requires advanced skills, so consider professional help here.
Not resolved? Review usage and setup.
Step 6: Verify Loading and Installation
Overloading restricts airflow—stick to recommended capacities. Use correct settings: high heat for cottons, low for delicates. Ensure the dryer is level (use a bubble level) and the vent hose isn’t kinked. Check that electric models get 240 volts (use a voltage tester) and gas valves are fully open.
Still issues? It’s likely advanced.
Step 7: Inspect Wiring and Control Board
Check for frayed or loose wires behind panels. A faulty control board can cause erratic heating but is costly ($100+), so confirm with diagnostics. Rare issues like bad timers or sensors may require specialized tools.
When to Call the Professionals
If you’ve tried these steps and the dryer still overheats, or if you’re dealing with gas components, complex electronics, or lack confidence, it’s time for expert intervention. Delaying can worsen damage or risks.
At North Vancouver Appliance Repair, we offer same-day service across North Vancouver, West Vancouver, and nearby areas. Our certified technicians handle all brands—Samsung, LG, Bosch—and use genuine parts for reliable repairs. We provide upfront pricing, warranties on labor and parts, and a friendly approach. A recent client in Deep Cove raved, “They fixed my dryer in one visit and explained everything clearly!” Whether it’s a quick vent clean or a major component replacement, we’ve got you covered. Book with us at https://northvancouverappliances.ca or call for a free quote.
Preventing Future Overheating
Keep your dryer running smoothly with these tips:
- Clean Lint Filter Every Load: Prevents buildup and improves efficiency.
- Annual Vent Cleaning: Essential in North Vancouver’s humid climate.
- Don’t Overload: Follow capacity guidelines for proper airflow.
- Use Dryer Balls: Boosts circulation, reduces drying time.
- Install a Lint Alarm: Alerts you to blockages.
- Dry Similar Fabrics: Optimizes heat settings.
- Clear Surrounding Area: Ensures ventilation.
- Schedule Maintenance: Our affordable plans catch issues early.
- Use Rigid Metal Vents: More efficient than flexible ones.
- Monitor Performance: Act on signs like longer drying times.
Final Thoughts
An overheating dryer is a solvable problem with the right approach. By following this guide, you can tackle many issues yourself, from clogged vents to faulty parts. For complex or risky repairs, trust North Vancouver Appliance Repair to restore your dryer’s performance. We’re proud to serve our community with honest, high-quality service, keeping your home running smoothly.
Visit https://northvancouverappliances.ca to book or learn more. Here’s to safe, efficient laundry days!