How to Clean Your Dryer Lint Trap, Drum, and Exhaust Vent
Knowing how to clean your dryer lint trap and drum properly is one of the most impactful maintenance habits you can build. The lint trap catches the majority of fibres shed during drying, but residue still builds up on the trap screen itself, inside the drum, and in the exhaust pathway over time. A dryer […]
Knowing how to clean your dryer lint trap and drum properly is one of the most impactful maintenance habits you can build. The lint trap catches the majority of fibres shed during drying, but residue still builds up on the trap screen itself, inside the drum, and in the exhaust pathway over time. A dryer that’s clean inside runs more efficiently, dries faster, uses less energy, and — most importantly — poses far less fire risk.
This guide covers how to clean each component correctly, how often, and what signs indicate the cleaning is overdue.
Part 1: Cleaning the Lint Trap Screen
The lint trap screen should be cleared after every single load — this is non-negotiable. A full lint trap restricts airflow through the dryer, forcing the machine to work harder, run hotter, and take longer to dry clothes.
Basic cleaning (after every load):
- Pull the trap out and peel the lint layer off the screen with your fingers.
- Reinsert and run the dryer.
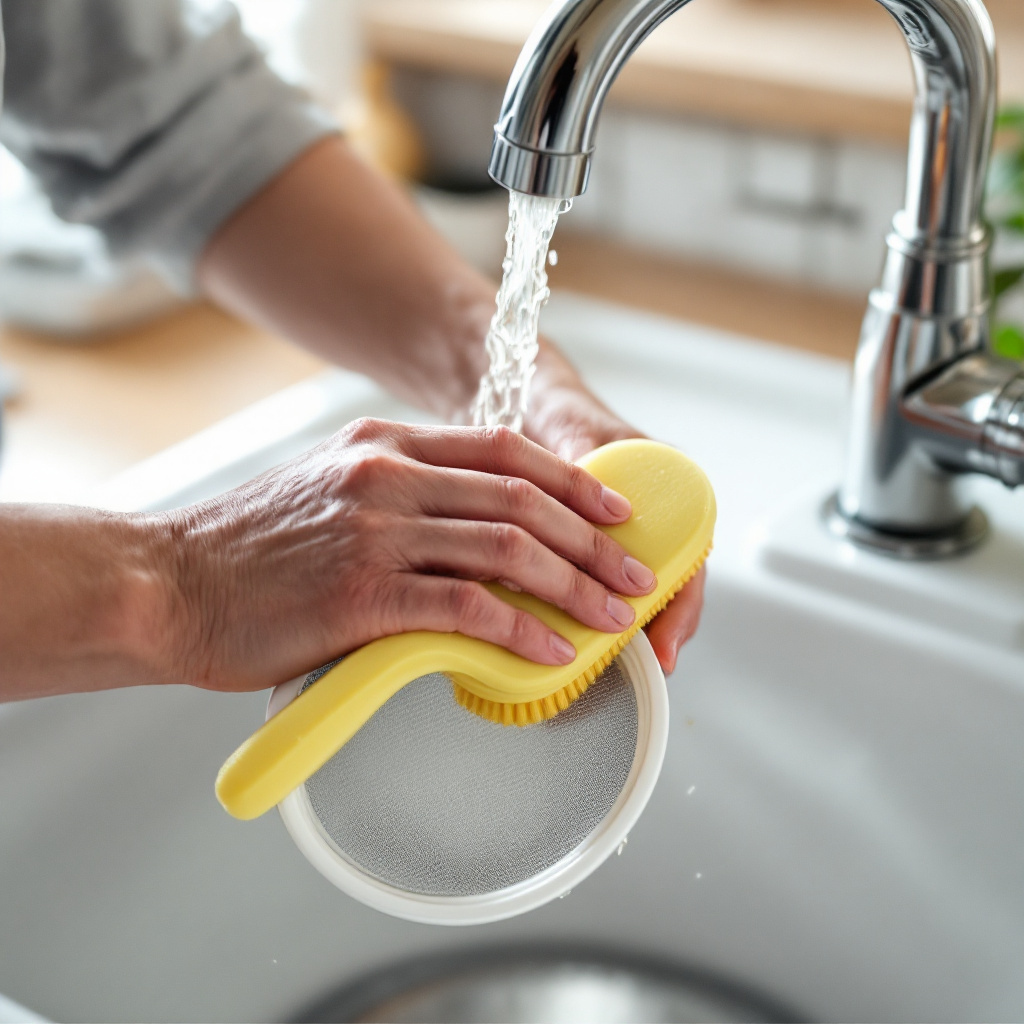
Deep cleaning the screen (monthly):
Over time — particularly if you use dryer sheets — a waxy, invisible film builds up on the lint screen mesh that standard lint removal doesn’t address. This film blocks airflow even on a “clean” screen.
- Remove the screen and hold it under running water. If water beads on the surface rather than flowing through the mesh freely, the screen has a film buildup.
- Scrub gently with a soft brush and a small amount of dish soap under warm running water.
- Rinse thoroughly and allow to dry completely before reinserting.
- A clean screen should allow water to pass straight through the mesh without beading.
Part 2: Cleaning the Lint Trap Housing
The slot the lint trap slides into collects lint along its walls that the trap itself doesn’t capture. This lint can eventually fall down into the dryer interior near the heating element.
- Use a long, flexible lint brush (available at hardware stores) to reach down into the lint trap slot and dislodge lint from the walls.
- Follow with the crevice tool on your vacuum to suction out the loosened debris.
- Do this monthly alongside your screen deep-clean.
Part 3: Cleaning the Dryer Drum
The drum interior accumulates residue over time: waxy deposits from dryer sheets, dye transfer from dark clothing, and general film from fabric softener. This residue can transfer onto lighter clothing and reduces the smooth surface that helps clothes tumble freely.
How to clean the drum:
- Dampen a clean cloth with white vinegar and wipe the entire drum interior — the drum walls, the back panel, and the drum baffles (the fins inside the drum).
- For stubborn residue or wax buildup, apply a small amount of rubbing alcohol to the cloth — this dissolves waxy dryer sheet residue very effectively.
- Wipe with a clean dry cloth after cleaning to remove any residue from the cleaning agent.
- Run the dryer on air-only (no heat) for 10 minutes with a few clean dry cloths inside before using it with laundry — this ensures no cleaning solution residue remains.
Removing dye stains from the drum:
A new item of dark clothing that bleeds dye can leave colour streaks inside the drum that then transfer onto lighter clothing. Apply non-gel toothpaste or a baking soda paste to the stain, let sit for 10 minutes, then wipe clean with a damp cloth. For stubborn dye transfer, a Magic Eraser works well on drum interiors.
Part 4: Cleaning the Exhaust Vent
This is the most critical and most neglected part of dryer maintenance. The exhaust duct carries hot, moist, lint-laden air from the dryer to the outside. Lint accumulates on the duct walls over time — particularly at bends — and reduces airflow progressively.
- Disconnect the duct from the back of the dryer and from the wall outlet.
- Use a long dryer vent cleaning brush (these come in flexible sections up to 3–4m long) to brush lint from the duct interior.
- Vacuum out the loosened lint from both ends.
- Check the exterior vent cap — remove any lint or debris from the flap and housing.
- Reconnect the duct securely — use foil tape rather than duct tape to seal joints, as standard duct tape doesn’t hold under heat cycles.
How often depends on use: annually for a household that does 4–5 loads per week; every 6 months for households that do laundry daily. Our article on dryer vent warning signs describes the symptoms of a duct that’s overdue for cleaning.
Signs Your Dryer Needs Cleaning Now
- Clothes take more than one cycle to dry completely
- The dryer or laundry room feels unusually hot during a cycle
- The outside of the dryer is hot to the touch
- A burning or musty smell during cycles
- The lint trap is noticeably fuller than usual after a short cycle
If your dryer is already taking too long to dry loads, a cleaning often resolves it without any repairs. Our guide on why your dryer takes too long to dry walks through how to confirm whether airflow restriction is the cause. And our broader guide on dryer fire hazard prevention puts lint cleaning in the context of the full safety maintenance routine.
When to Call a Professional
Lint trap and drum cleaning are entirely DIY. Duct cleaning for long or complex duct runs — particularly those that run through walls, attics, or multiple bends — is best done by a professional with commercial equipment that can clean the full duct length effectively.
North Vancouver Appliances offers dryer servicing and safety inspections across North Vancouver and the North Shore. Visit our dryer repair page to schedule a visit.